Vanilla Sugar Cookies
Crisp, buttery vanilla sugar cookies mixed by hand with a wooden spoon, no mixer needed. Made with icing sugar, egg yolk and a little rice flour, they hold their shape and every stamped detail beautifully, ready to leave plain, fill with hundreds and thousands or finish with fondant for gifting.
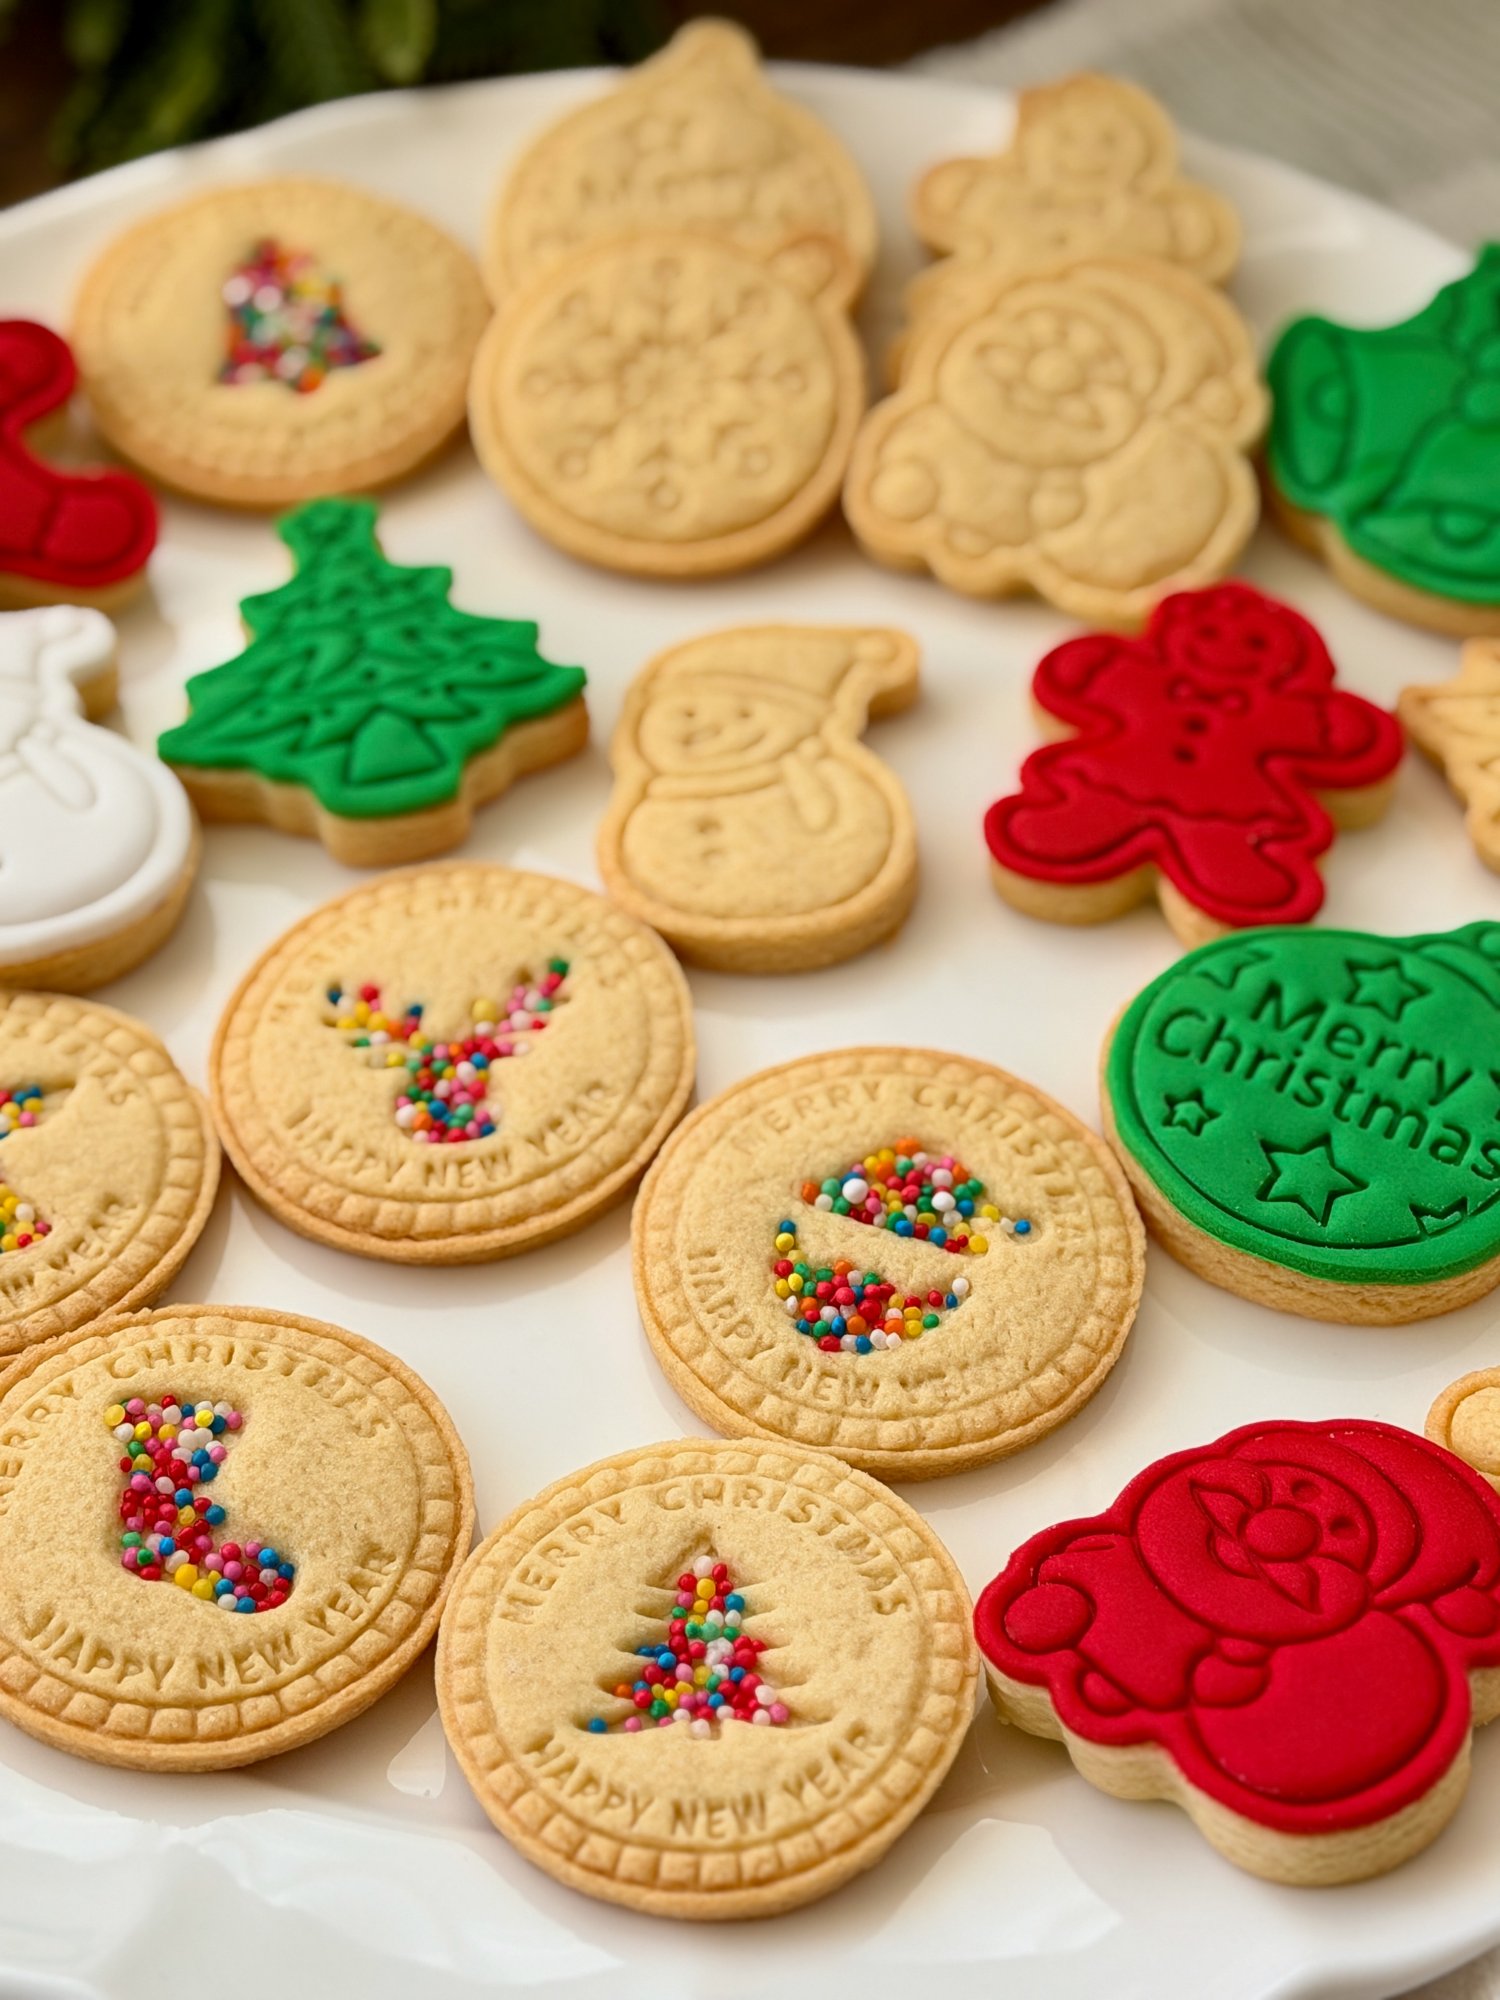
A good sugar cookie needs to do more than taste lovely. I want one that rolls easily, keeps the smallest details from a favourite cookie stamp and has that satisfying little snap when you bite into it.
Working through my well-worn 1920s cookbooks, I came to understand what each ingredient brings to a cookie, and this dough is built on those simple lessons. Icing sugar and egg yolk keep it smooth and rich, a little rice flour gives it a crisp, short finish, and everything comes together in one bowl with a wooden spoon.
At Christmas I bring out every festive cutter and stamp I own. Some cookies get a generous spoonful of hundreds and thousands pressed into the stamped shapes, a little nod to the fairy bread at every Australian birthday party, while others are finished with a smooth layer of red, green or white fondant. Packed into small boxes with tissue paper, they make a lovely homemade gift for teachers, neighbours and anyone who drops by over the holidays.
The same dough works just as well throughout the year for birthdays, Easter or a simple batch to keep in the biscuit tin.
Prep: 30 min · Cook: 21 min · Yield: 30 About 30 cookies at 5 mm thick (depending on cutter size) · Cuisine: Australian · Category: Baking
Ingredients
Vanilla Sugar Cookies
- 250 g salted butter, softened
- 160 g pure icing sugar, sifted
- 2 egg yolks, from large eggs
- 3 tsp vanilla extract or vanilla bean paste
- 40 g rice flour
- 420 g plain flour, plus a little extra for kneading
To decorate (optional)
- Hundreds and thousands
- Store-bought fondant in red, green and white
- A little fresh water
- Cornflour, for dusting
Method
- Place the softened butter and sifted icing sugar in a large bowl. Using a wooden spoon, press and squash the mixture against the side of the bowl until it is smooth and just combined. Work gently, as the aim is to add as little air as possible.
- Add the egg yolks and vanilla and press them through the butter mixture in the same way until combined.
- Add the rice flour and mix until fully incorporated.
- Add the plain flour and mix until the dough looks like damp crumbs and begins to come together.
- Turn the dough onto a lightly floured bench and knead briefly until smooth. The edges may crack a little as you roll, which is normal for this dough.
- Roll the dough to 5 mm thick. Cut and stamp into your desired shapes, pressing the stamps firmly and evenly, then transfer to lined baking trays. Brush away any flour left in the stamped designs with a dry pastry brush. If you plan to top any cookies with fondant, cut those shapes but leave them unstamped.
- If using hundreds and thousands, spoon them generously into the stamped shapes right to the edges, then press down very gently with a fingertip so they settle into the dough.
- Place the trays in the freezer for 30 minutes.
- Meanwhile, preheat the oven to 150°C fan forced.
- Bake straight from the freezer on the middle shelf for 21 minutes, until the edges are lightly golden and the tops are set but still pale. Allow the cookies to cool on the tray for a few minutes before transferring to a wire rack to cool completely.
- Make sure the cookies are completely cool before adding fondant.
- Roll the fondant thinly on a surface lightly dusted with cornflour, then cut out your shapes with the same cutters used for the cookies.
- Dip a pastry brush in a little fresh water and lightly brush the surface of each cookie. A light touch is all you need.
- Lay the fondant cut-out on top of the cookie, then press the stamp firmly into the fondant to emboss the design.
Storage Notes
Once completely cool, store the cookies in an airtight container at room temperature. Keep fondant-topped cookies out of the fridge, as the fondant becomes sticky and loses its finish. Their crisp, sturdy texture makes them well suited to packing into boxes or bags for gifting.
Make Ahead Notes
The cut and stamped cookies can be frozen for up to 1 month. Freeze them on a lined tray until firm, then pack into an airtight container with baking paper between the layers. Bake straight from the freezer, adding a minute or two to the baking time if needed.
Cook's Notes
Why this dough holds its shape
Gentle mixing: Beating butter and sugar until pale and fluffy traps air in the dough. In the oven that air expands, the cookies rise, and the stamped design softens and fades. Pressing the butter and sugar together with a wooden spoon keeps the dough dense, so every detail stays crisp.
Icing sugar: Fine icing sugar blends smoothly into the butter without adding air, so the dough holds its outline. It also gives the baked cookies a fine, smooth surface that takes stamps and fondant beautifully.
Egg yolk only: Egg white is mostly water, which turns to steam in the oven and lifts the dough. The yolks alone bring richness and bind everything together without the puff.
Rice flour: Unlike plain flour, rice flour forms no gluten. A small amount gives these cookies their crisp, short texture and clean little snap, and helps them hold their edges in the oven.
No baking powder or bicarb soda: Without a raising agent, the dough has nothing pushing it up or out. The cookies bake flat and even.
These cookies bake with lightly golden edges and pale tops. That soft gold rim is your sign they are ready, and it gives the stamped detail lovely definition.
Store-bought fondant works beautifully here and keeps things simple. Use just a light brush of water to attach it, as too much will make the fondant slide and turn sticky.
Standard supermarket hundreds and thousands hold their colour well in the oven. Add them before the freezer rest so they bake into the dough.
Reroll the offcuts once or twice, or cut them into small fingers, prick with a fork and bake alongside the stamped cookies for a little shortbread-style treat.
The stamp cutters I used are this Merry Christmas round stamp set and this 8-piece Christmas stamp set. These are affiliate links, so I may earn a small commission at no extra cost to you.
The Grace Table Tip
For gifting, line a small box with tissue paper and stand the cookies upright, mixing plain, sprinkled and fondant-topped ones so every box looks a little different. Pack them only once completely cool, and tuck extra tissue into any gaps so they don't shift on the way.
Leave these plain, emboss them with cookie stamps, fill the shapes with hundreds and thousands or top them with fondant. The same dough works beautifully with seasonal cutters all year round.