Simple Rosemary Focaccia
A soft, golden focaccia made with Caputo 00 flour, olive oil, rosemary and flaky salt. It has a crisp top, a tender open crumb, and is perfect for serving with warm beans, roasted tomatoes, whipped ricotta or good olive oil.
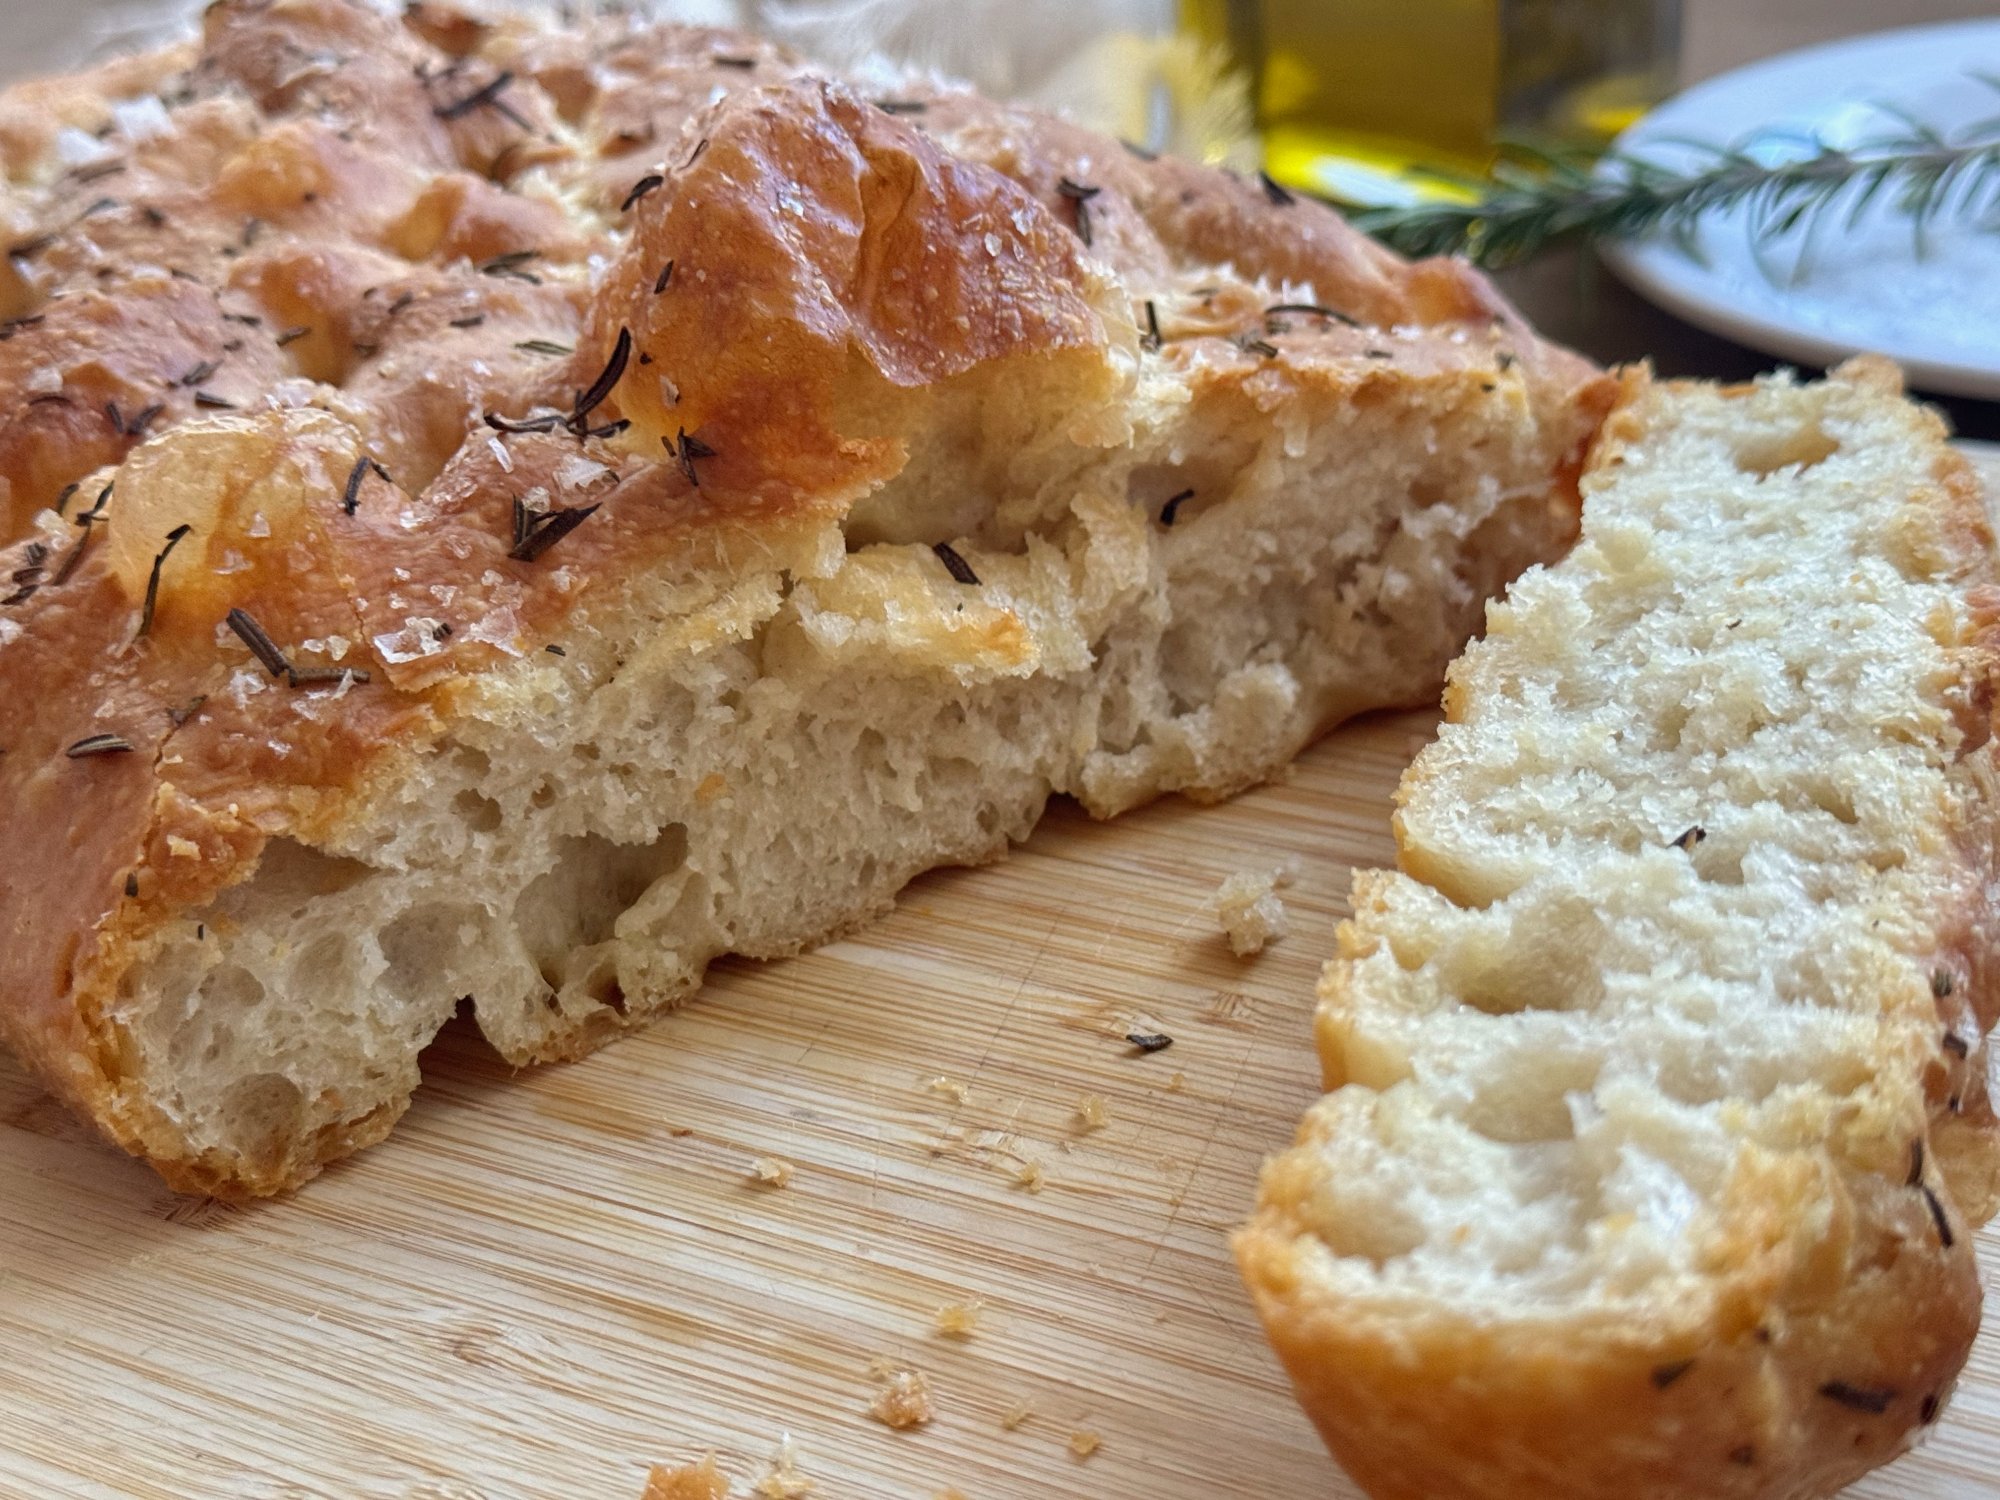
Warm focaccia on the table always feels generous. The golden crust, rosemary, olive oil and soft open crumb make it the kind of bread people reach for before the meal has properly begun. This version is simple enough for a quiet kitchen day, but special enough to serve with little bowls of beans, tomatoes, dips and anything that wants a piece of bread beside it.
Prep: 20 min · Cook: 45 min · Yield: 1 Tray focaccia · Cuisine: Mediterranean · Category: Bread
Ingredients
Simple Rosemary Focaccia
- 500g Caputo Classica 00 flour
- 7g instant dried yeast
- 10g fine salt
- 600ml lukewarm water
- 2 tablespoons olive oil, plus extra for folding, greasing and topping
- 1 to 2 tablespoons chopped fresh rosemary
- Flaky salt, for topping
Method
- Add the flour, yeast and fine salt to a large mixing bowl. Stir to combine.
- Pour in the lukewarm water and olive oil. Mix with a wooden spoon or your hand until all the flour is hydrated and you have a very wet, sticky dough. It should look soft and shaggy, not firm like a standard bread dough.
- Cover the bowl and rest for 30 minutes.
- With oiled hands, lift one side of the dough up and fold it over itself. Turn the bowl and repeat three more times, folding from each side. Cover and rest for another 30 to 45 minutes.
- Repeat the stretch and fold once more. Cover again and allow the dough to rise until it is puffy, airy and showing bubbles.
- Generously oil a deep ceramic baking dish or tray. Gently tip the dough into the dish, keeping as much air in it as possible. Let it relax for 15 to 20 minutes, then gently ease it toward the edges of the dish with oiled fingers. Do not force it if it resists.
- Cover and allow the dough to rest again until it looks puffy, relaxed and bubbly. If the dough is already very active, this may only take 15 to 30 minutes.
- Preheat the oven to 220°C fan or 240°C conventional.
- Drizzle the top generously with olive oil. Use oiled fingers to dimple the dough deeply all over, taking care not to squash out all the air. Sprinkle with chopped rosemary and flaky salt.
- Bake for 35 to 45 minutes, until the focaccia is deeply golden on top, browned around the edges and cooked through. A deep ceramic dish may need the full 45 minutes.
- Rest in the dish for 10 to 15 minutes, then gently loosen the edges and lift out if it releases cleanly. Serve warm or at room temperature.
What Makes a Good Focaccia
Focaccia is one of the most forgiving breads you can make at home, and also one of the most rewarding. There are no complicated shaping techniques, no scoring, no steam injection. What you need is a very wet dough, good olive oil, patience during the rises, and the confidence to let it bake until it is properly, deeply golden. The hallmarks of a great focaccia are a crisp, glossy top with visible dimples holding pools of olive oil, a tender and open crumb with irregular air bubbles throughout, and a bottom that is golden and a little crisp from the oil in the dish. It should feel light when you pick it up, not dense or bready. Torn into pieces at the table, it is one of the most generous things you can put in front of people.
Understanding the Dough
This focaccia is made with Caputo Classica 00 flour, an Italian all-purpose flour that is softer and lower in protein than strong bread flour. It produces a very tender, delicate crumb, but because it absorbs water differently to a high-protein bread flour, the dough needs significantly more hydration to achieve the right texture. At 600 ml of water to 500 g of flour, this is a very wet dough. That is intentional. A loose, sticky, almost pourable dough is what gives focaccia its characteristic open crumb and soft interior. If you add more flour to make it easier to handle, you will end up with a denser, breadier result. Work with oiled hands rather than floured hands. Oil keeps the dough from sticking without tightening the gluten structure, which is exactly what you want here. If you are using strong bread flour rather than 00 flour, start with 500 ml of water. Strong flour absorbs more liquid and the dough will feel different. Add extra water gradually only if the dough feels tight or is not coming together smoothly.
The Stretch and Fold Method
Because this dough is too wet to knead in the traditional sense, it is developed through a series of stretch and fold cycles during the first rise. This builds the gluten structure gently without deflating the dough or adding tension. To stretch and fold, wet or oil your hand, reach under one side of the dough, lift it up as far as it will stretch without tearing, and fold it over itself toward the centre. Turn the bowl a quarter turn and repeat. Do this four times in total, working around the bowl. Cover and rest, then repeat the process once more after another 30 to 45 minutes. After two rounds of stretch and folds, the dough should feel noticeably smoother, more elastic and more cohesive than when you started, even though it is still very soft and sticky. That change in texture tells you the gluten is developing properly.
Getting the Bake Right
Focaccia needs a hot oven and enough time to develop real colour. Pale focaccia is undercooked focaccia. You are looking for a deeply golden top, browned and slightly crisp edges, and a bottom that has coloured in the oil. A deep ceramic baking dish, like the one used here, gives you a taller focaccia with a more open crumb, but it takes longer to bake through. Allow the full 45 minutes and check the edges and base before pulling it out. A shallow metal tray will bake faster and give you a flatter, crispier result. The olive oil in the dish is not just for preventing sticking. It fries the base of the focaccia as it bakes, which is what gives it that distinctive golden, slightly crisp bottom. Be generous. This is not the place to hold back on olive oil. Rest the focaccia in the dish for 10 to 15 minutes before lifting it out. This allows the structure to set and makes it much easier to remove cleanly.
Serving Suggestion
Serve this focaccia warm with Warm Cannellini Beans with Garlic and Olive Oil, Whipped Ricotta & Feta Focaccia with Roasted Vine Tomatoes, or a simple bowl of good olive oil for dipping. It is also beautiful alongside roasted vegetables, salads, soups and Mediterranean-style sharing plates.
Storage
Cool the focaccia completely before storing. Wrap in baking paper, then foil, or place in an airtight container and keep at room temperature overnight. Do not refrigerate, as the crumb will firm more quickly.
Make ahead notes
Day-old focaccia can be refreshed in a 180°C oven for 5 to 8 minutes, or toasted cut-side down in a pan with a little olive oil. Slightly toasted focaccia is especially good for topping with ricotta, tomatoes or beans because it holds its structure well.
Frequently asked questions
Can I make this ahead of time? Yes. Focaccia is best on the day it is baked, but day-old focaccia refreshes beautifully in a 180°C oven for 5 to 8 minutes. You can also toast slices cut-side down in a pan with a little olive oil, which makes it especially good for topping with ricotta or beans.
Can I use plain flour instead of 00 flour? Plain flour will work, but start with 500 ml of water rather than 600 ml and add more gradually if needed. The texture of the crumb will be slightly different but the method is the same.
Why is my dough so wet and sticky? That is correct. A high-hydration dough is what gives focaccia its open, tender crumb. Use oiled hands, not floured hands, and trust the process. The dough will become smoother and more manageable after the stretch and fold cycles.
Can I add toppings other than rosemary? Absolutely. Thinly sliced red onion, olives, cherry tomatoes, or fresh thyme all work beautifully pressed into the dimples before baking. Keep toppings simple and press them in gently so they stay in place.
What dish should I use? A deep ceramic baking dish gives a taller focaccia with a soft, open crumb. A shallow metal tray gives a flatter, crispier result. Both work well. Avoid glass dishes if possible as they conduct heat differently and can give uneven results.
How do I know when it is done? The top should be deeply golden and the edges should be browned and pulling away from the sides of the dish. If you are unsure, gently lift one corner with a spatula to check the base. It should be golden, not pale.
Can I freeze focaccia? Yes. Cool completely, slice into portions, wrap well and freeze for up to one month. Reheat from frozen in a 180°C oven for 10 minutes.
Cook's Notes
Strong bread flour can take a lot of water. This tested version used Caputo Classica 00 flour and the full 600 ml, which produced a soft, open crumb.
The dough should be very sticky and loose. Use oiled hands rather than adding extra flour.
Dish choice changes the bake time. A deep ceramic dish gives a taller focaccia but may need closer to 45 minutes, while a shallow metal tray may bake faster.
Let the dough relax before stretching it in the dish. If it resists, stop and give it another 10 minutes before trying again.
Focaccia is better properly golden than pale. Look for browned edges, a set centre and a glossy, crisp top.
The Grace Table Tip
Serve this focaccia torn into generous pieces rather than cut too neatly. The open crumb catches olive oil beautifully, and the rustic pieces look especially inviting on a shared table.
If using plain flour or a lower-protein flour, start with 500 ml water and add more only if needed. The dough should be soft, sticky and fully hydrated, but different flours absorb water differently.