Pastéis de Nata (Portuguese Custard Tarts)
Pastéis de nata are Portugal's beloved custard tarts: crisp, flaky pastry shells filled with golden custard scented with lemon, cinnamon and the gentlest touch of star anise. This version uses store-bought butter puff pastry shaped into spiral shells, so the tarts bake with the curled, layered sides they are known for. Serve them slightly warm with coffee and a dusting of cinnamon.
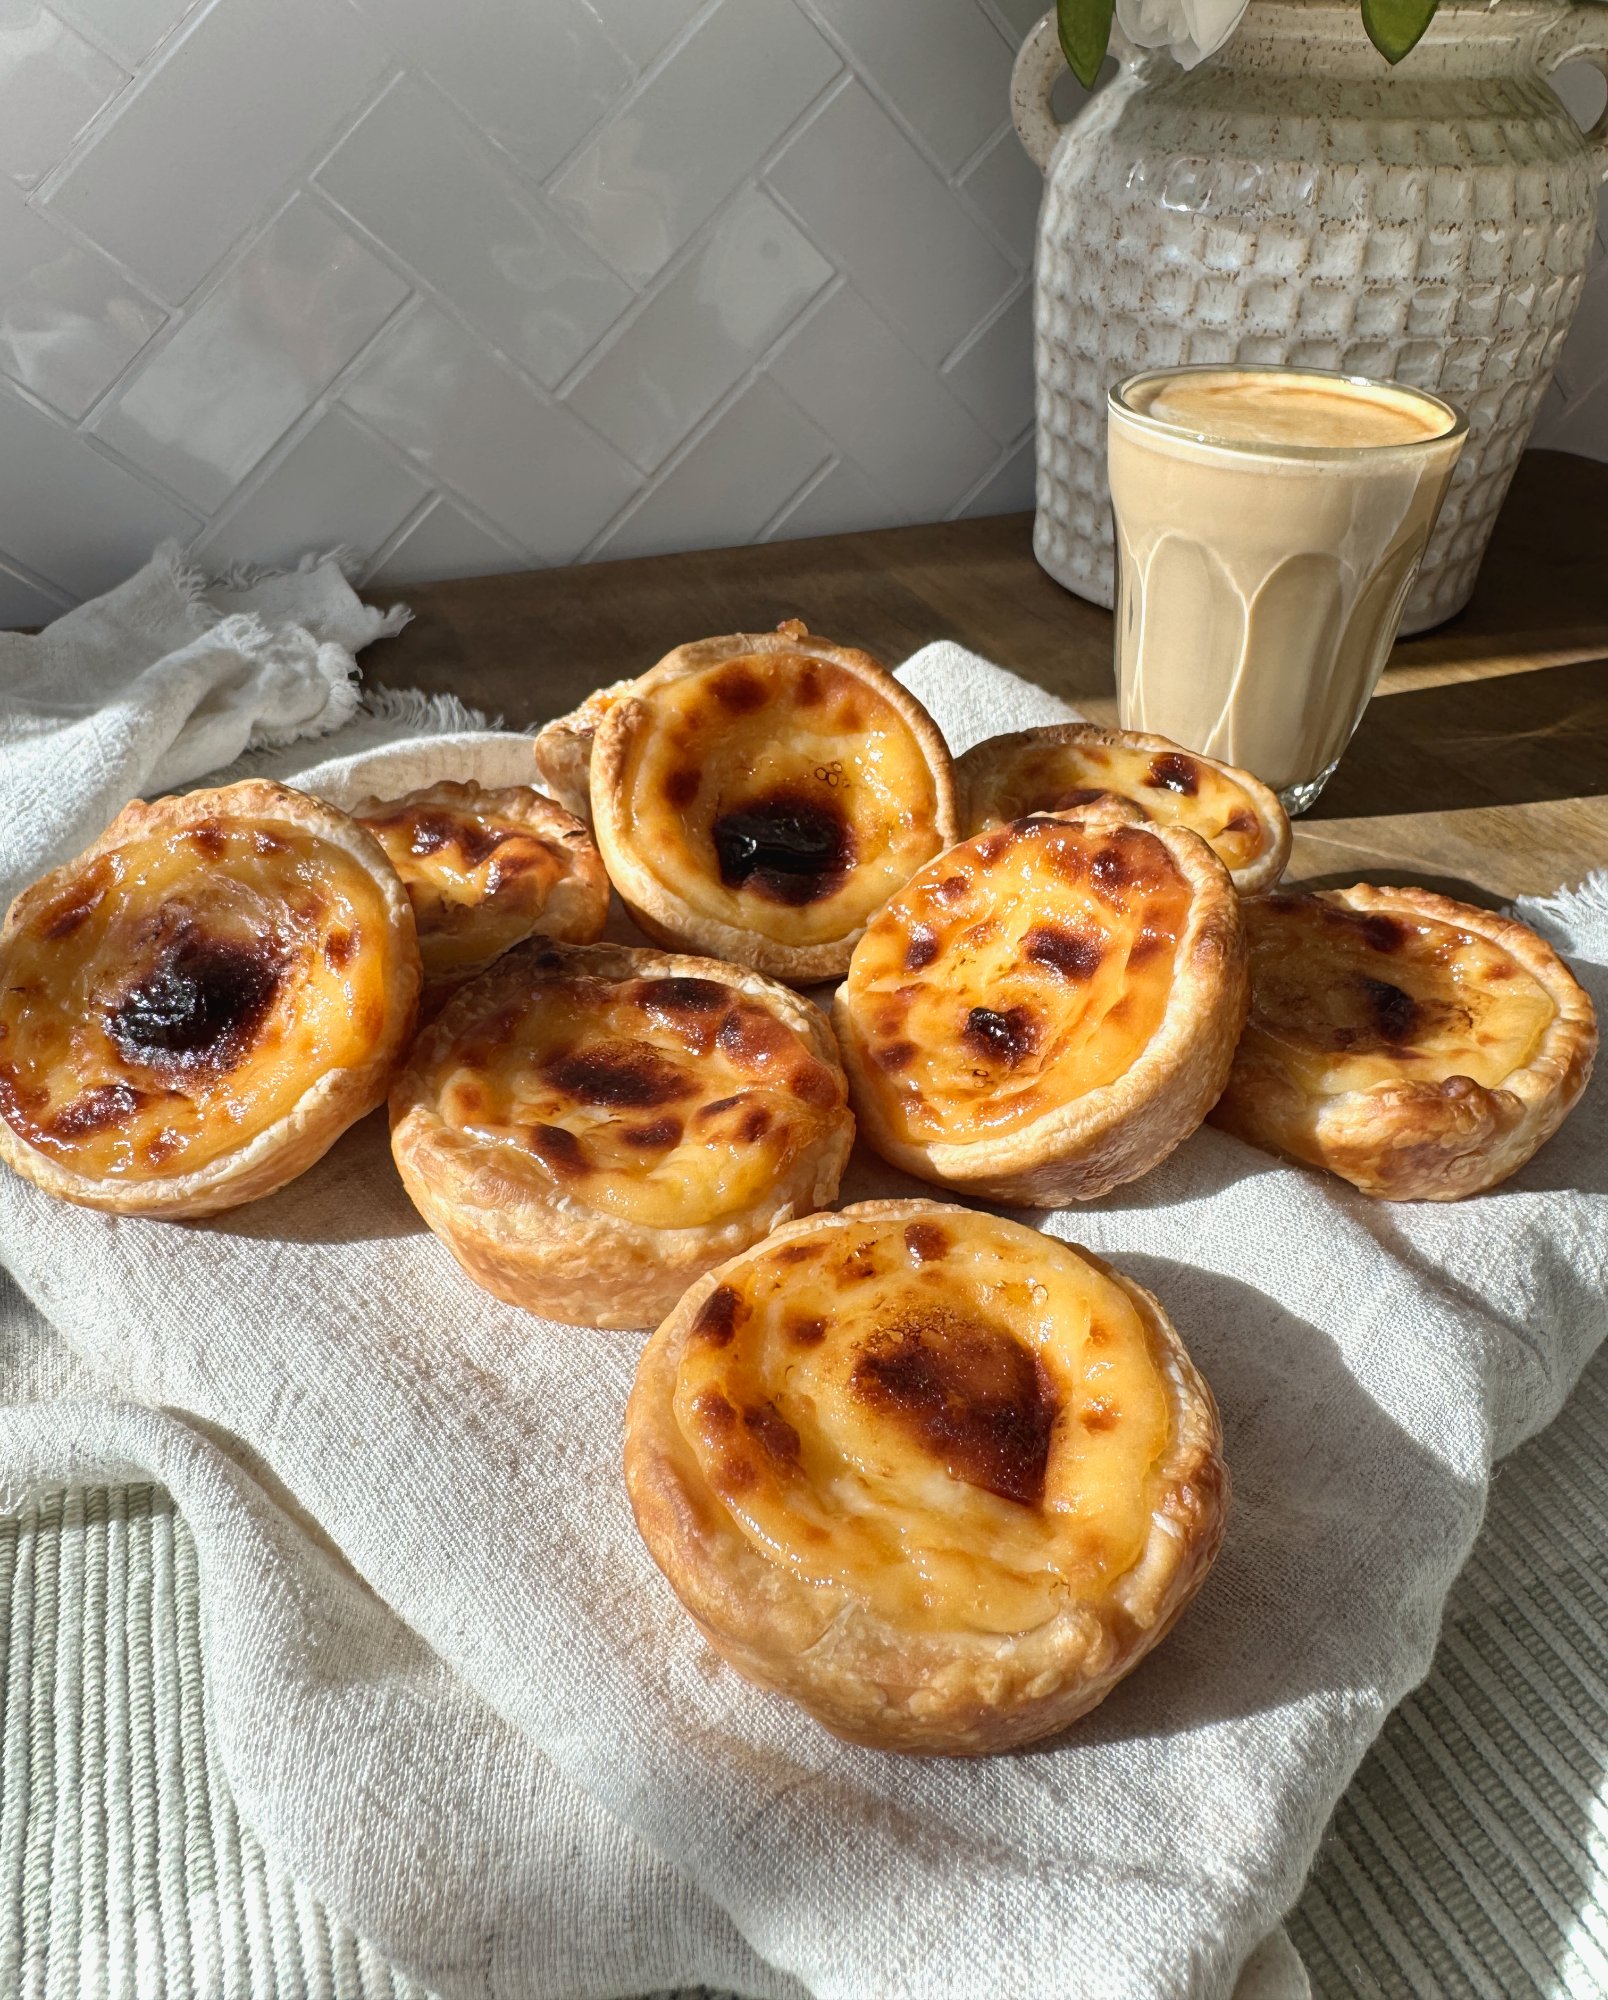
After twenty years of baking, pastéis de nata remain the recipe I treat with the most respect. In our family they belong to gatherings and slow Sunday afternoons, eaten slightly warm while the custard is still soft and the pastry shatters when you bite into it. The flavour lives in the syrup: real lemon peel, a cinnamon stick, and half a star of anise, my own addition, that comes out the moment the syrup simmers, leaving a quiet warmth behind the custard rather than sitting on top of it. Every part of this method has been tested in my kitchen until it behaves the same way every single time.
Prep: 35 min · Cook: 14 min · Yield: 12 Tarts · Cuisine: Portuguese · Category: Desserts
Ingredients
For the pastry
- 2 sheets butter puff pastry, thawed until soft and pliable
- butter or oil spray, for greasing the muffin tin
For the syrup
- 150g caster sugar
- 75ml water
- 1 cinnamon stick
- 3 to 4 wide strips lemon peel, avoiding the white pith
- ½ whole star anise
For the custard
- 250ml lactose-free full cream milk
- 10g cornflour
- 10g plain flour
- pinch of fine salt
- 5 large egg yolks (approximately 85 to 95g total)
- ground cinnamon, optional
Method
- Lightly grease a 12-hole muffin tin.
- Working with one thawed puff pastry sheet at a time, make sure the pastry is soft enough to roll without cracking. Roll the sheet tightly into a log, like a snail scroll.
- Cut each pastry log into 6 equal pieces. You should have 12 pieces in total.
- Turn each piece cut-side up so the spiral is facing you. Using your fingers and thumbs, gently press and rotate the pastry outward to form a small, shallow pastry cup. Keep the spiral base intact and encourage the pastry layers to move up the sides. Aim for thin walls rather than deep, tall sides.
- Press each pastry cup into the muffin tin, keeping the shells shallow rather than deep. The pastry should come a little way up the sides of the tin, but it does not need to be perfectly even. Chill the lined tin for at least 20 minutes while you make the custard.
- Make the syrup. Place the caster sugar, water, cinnamon stick, lemon peel and star anise in a small saucepan. Bring to a simmer, then remove the star anise as soon as the syrup begins to simmer.
- Continue simmering the syrup for 3 to 4 minutes, until the sugar has fully dissolved and the syrup looks clear and glossy. Remove from the heat and allow the lemon peel and cinnamon to steep while you prepare the milk base.
- Place the cornflour, plain flour and salt in a medium saucepan. Add a small splash of the milk and whisk until smooth. Gradually whisk in the remaining milk.
- Cook over medium-low heat, whisking constantly, until the mixture thickens lightly and coats the back of a spoon. It should be smooth and pourable, not thick like pudding.
- Remove the cinnamon stick and lemon peel from the syrup. Slowly pour the warm syrup into the milk mixture, whisking gently until combined.
- Whisk the egg yolks in a separate bowl, then slowly whisk in a ladleful of the warm custard base to temper them. Pour the yolk mixture back into the saucepan and whisk gently until smooth. Do not beat too much air into the custard.
- Strain the custard through a fine sieve into a jug. Allow it to cool fully to room temperature before filling the shells. This step matters: a properly cooled custard gives the pastry time to crisp in the oven before the eggs set, which keeps the custard silky rather than split.
- Preheat the oven to 220 to 230°C. Place a baking tray in the oven while it preheats. A hot oven blisters the tops and crisps the pastry quickly, so if your oven runs cool, lean towards the higher end.
- Pour the fully cooled custard into the chilled pastry shells, filling each one only about three-quarters full. Do not overfill, as the custard puffs as it bakes.
- Place the muffin tin onto the hot tray and bake for 10 to 14 minutes, until the pastry is golden and crisp around the edges and the custard is puffed and lightly set. Most home ovens never reach the fierce heat of a bakery oven, so if you would like more of those dark caramelised spots, finish the tarts under a hot grill for the last 30 to 60 seconds. Stay with them the whole time, as they colour fast. The custard should still look softly set, not dry or cracked, and it can split if baked too long.
- The custard will rise in the oven, then sink back as it cools. This is normal.
- Let the tarts rest in the tin for 5 minutes, then carefully transfer to a wire rack. Cool for at least 10 minutes before serving.
A Note on the Pastry
Traditional pastéis de nata are made with a hand-laminated pastry, folded and rolled until the layers number in the dozens, and I make that version too. It will have its own place on this site in time. For this recipe I have chosen good butter puff pastry from the supermarket, rolled into a log and shaped so it still bakes into crisp spiral layers, because a recipe you can make on a Tuesday afternoon is a recipe that actually gets made. The custard, the syrup and the blistered tops are exactly as they should be. The only shortcut here is time, never flavour.
Serving Suggestion
Serve pastéis de nata slightly warm with coffee and a light dusting of cinnamon. They are lovely as an afternoon sweet, after a simple family meal, or as part of a Portuguese-style gathering alongside a basket of Portuguese Bread Rolls (Papo Secos) and a pot of strong coffee.
Storage Notes
Pastéis de nata are best on the day they are baked, while the pastry is crisp and the custard is soft. Store leftovers in an airtight container in the fridge for up to 2 days and reheat briefly in a hot oven to help refresh the pastry.
Notes
Rolling the puff pastry into a tight log before cutting creates spiral layers that bake into crisp, flaky sides. This gives a much better result than simply cutting flat pastry circles.
Standard muffin tins are deeper than the shallow tins used for traditional pastéis de nata, so keep your pastry shells shallow rather than deep and do not overfill them. A shallower shell with a little less custard bakes faster, gives you the proper pastry-to-custard balance, and helps stop the custard from overbaking.
The pastry needs to be soft enough to shape, but not warm and greasy. If it becomes too soft to handle, place it back in the fridge for a few minutes before continuing.
The custard uses equal amounts of cornflour and plain flour, 10g of each. The cornflour gives a smoother, silkier finish, while the plain flour adds a little stability so the filling holds through the hot bake. A 50/50 blend gave me the best balance of the two.
Watch the custard closely on the stove and whisk continuously. Once the starches activate it can go from thin to thick in seconds, so the moment it lightly thickens and still pours easily, take it off the heat. It should never become a thick, pudding-style custard, as most of the final setting happens in the oven.
Use 5 large egg yolks, around 85 to 95g in total. Egg sizes vary between countries, brands and even cartons, and this affects the colour, richness and final set of the custard. A paler custard does not mean anything has gone wrong, it may simply be the eggs you used.
Most home ovens never reach the fierce heat of a bakery oven, which is what blisters traditional pastéis de nata in moments. A quick finish under a hot grill closes that gap at home and gives you those dark caramelised spots, without leaving the tarts in long enough for the custard to overbake.
The star anise is my own addition and not something you will find in many traditional versions. After twenty years of baking, my instinct was that the custard needed something to round out the sharpness of the lemon and soften the edge of the sugar, and star anise does exactly that. Its key aromatic compound, anethole, is naturally perceived as sweet on the palate, so a small amount deepens the custard and bridges the lemon, cinnamon and egg richness without ever tasting of aniseed. Removing it as soon as the syrup reaches a simmer keeps it as a quiet warmth in the background rather than a flavour you can name.
Traditional pastéis de nata are flavoured with lemon and cinnamon rather than vanilla. If you have only had vanilla custard tarts before, the flavour here is brighter and more aromatic, and it is the authentic profile.
The custard works identically with regular full cream milk. Lactose-free full cream milk is simply what I bake with at home, and it behaves exactly the same in this recipe.
The Grace Table Tip
For the best texture, chill the shaped pastry shells and cool the custard completely before filling. Cold pastry and cool custard going into a hot oven give the layers time to puff and crisp before the custard sets, which is what keeps the inside silky rather than split.
Oven temperatures vary, so watch the tarts closely. You are looking for deeply golden, crisp pastry, blistered and lightly caramelised custard tops, and a centre that is softly set rather than liquid or cracked. If the tops are colouring before the pastry has crisped, your oven may run hot. If they are baking pale, push the temperature higher next time, as a hot oven is what gives pastéis de nata their character.